- Local time
- Today, 07:53
- Joined
- Jul 9, 2003
- Messages
- 17,345
Excel in Access (Part 3)
Unfortunately photobucket have decided to shove all of their pictures behind a paywall rendering this blog practically useless! I have a copy of it on my website which I have kept up to date you can find it here:- http://www.niftyaccess.com/excel-in-...access-part-3/
Excel in Access (Part 1)
Excel in Access (Part 2)
Video Version HERE:
Using the normalization form --- we converted part of a spreadsheet type table into the beginnings of a relational table.
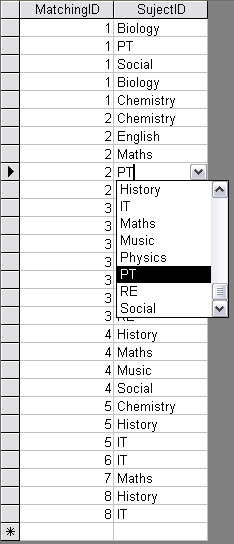
From this table we derived a “look up table” now giving us a total of three tables, the remains of the first table, “tblStudent” (the student names), the next table “tblStudentSubject” stores the subject(s) related to each student, and finally a third table, “tblSubject” a “look-up table” to store the actual subject description.

From the table “tblStudentSubject” we created a form in datasheet view:
Now all we need do is combine this datasheet view form with a form based on the students list, and this will give us a form for correctly displaying the student names and the subject(S) the student is taking in one Form:
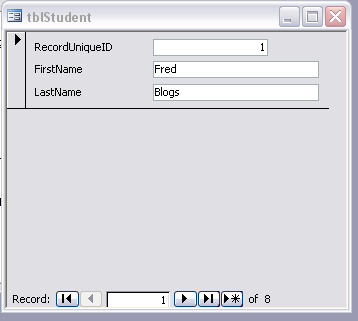
Using the wizard create a basic form from the student table and name it “frmStudent” arrange its size so it has some open space as shown.
Now open “frmStudent” in design view
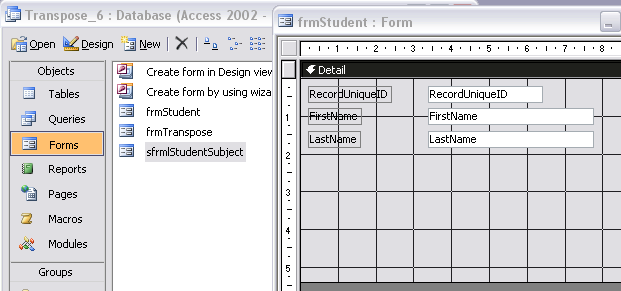
And drag the subform “sfrmlStudentSubject” into the clear area on the student form “frmStudent”

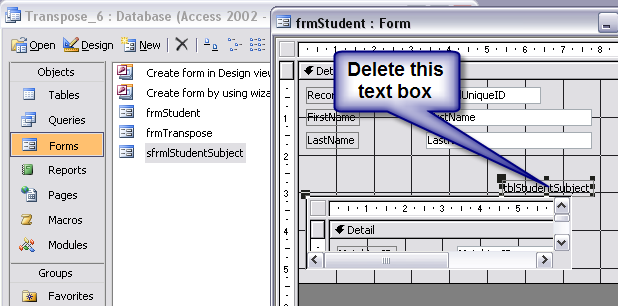
You may wish to delete the text box, you don’t have to but I usually find it looks better without it.
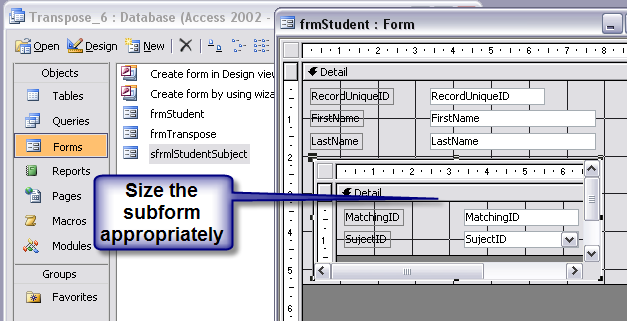
Size the form to suit
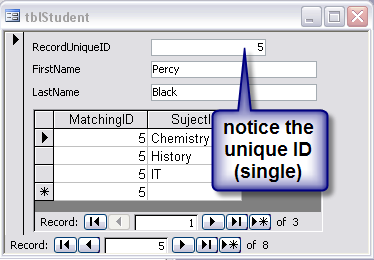
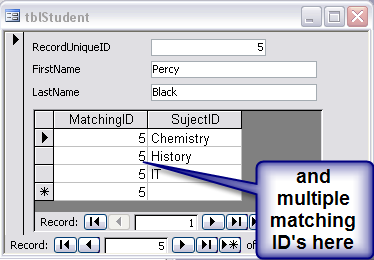
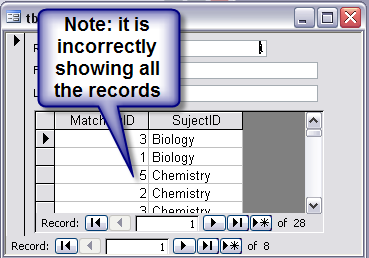
Now save the form and have a look, you will notice that it incorrectly shows all of the records in the subform,
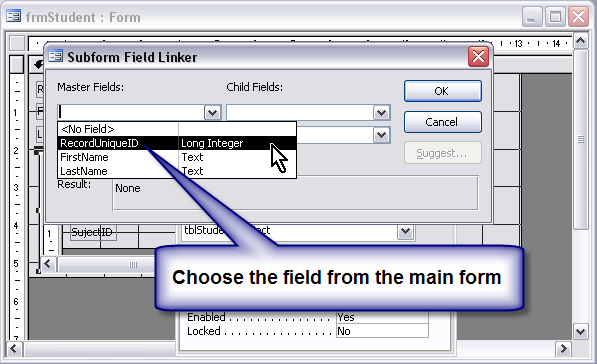
Now the next bit is tricky, for two reasons, the form isn’t really on top of the other form, it actually sits in a subform window and you need to gain access to the properties of this subform window by clicking on the tiny line that you can just see around your subform. This can be a difficult task to master first time.
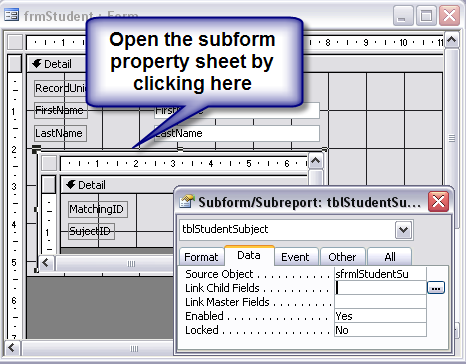
Now open the “subform field linker” dialog box by clicking on the ellipsis (…)

Phone: +44 1635 522233
Mobile: +44 7747 018875
Email: email@tonyhine.co.uk
Web: http://msaccesshintsandtips.ning.com
Unfortunately photobucket have decided to shove all of their pictures behind a paywall rendering this blog practically useless! I have a copy of it on my website which I have kept up to date you can find it here:- http://www.niftyaccess.com/excel-in-...access-part-3/
Excel in Access (Part 1)
Excel in Access (Part 2)
Video Version HERE:
Using the normalization form --- we converted part of a spreadsheet type table into the beginnings of a relational table.
From this table we derived a “look up table” now giving us a total of three tables, the remains of the first table, “tblStudent” (the student names), the next table “tblStudentSubject” stores the subject(s) related to each student, and finally a third table, “tblSubject” a “look-up table” to store the actual subject description.
From the table “tblStudentSubject” we created a form in datasheet view:
Now all we need do is combine this datasheet view form with a form based on the students list, and this will give us a form for correctly displaying the student names and the subject(S) the student is taking in one Form:
Using the wizard create a basic form from the student table and name it “frmStudent” arrange its size so it has some open space as shown.
Now open “frmStudent” in design view
And drag the subform “sfrmlStudentSubject” into the clear area on the student form “frmStudent”
You may wish to delete the text box, you don’t have to but I usually find it looks better without it.
Size the form to suit
Now save the form and have a look, you will notice that it incorrectly shows all of the records in the subform,
Now the next bit is tricky, for two reasons, the form isn’t really on top of the other form, it actually sits in a subform window and you need to gain access to the properties of this subform window by clicking on the tiny line that you can just see around your subform. This can be a difficult task to master first time.
Now open the “subform field linker” dialog box by clicking on the ellipsis (…)
Phone: +44 1635 522233
Mobile: +44 7747 018875
Email: email@tonyhine.co.uk
Web: http://msaccesshintsandtips.ning.com
Last edited: