Ok,
I don't know what version of Access your are using but attached is a word document with image illustrations of the process I follow to import csv files. I'm not familiar with the later versions procedure for importing csv files but I am assuming it is something similar to the contects of the attached word document.
As I do not know what naming convension you intend to follow I have stuck with a generic approach, you of course name your table and fields according to your own requirements.
If you follow the images in order in the word document you should hopefully understand the manual import process [which you can then later automat].
First off choose File/Get External Data\Import [1st Image]
Then when the import window pops up navigate to the location of where your text file to be imported is [2nd image], ensure that the "Files of type:" shows "Text Files(*.txt;*.csv;*.tab;*.asc)" and then select the text file to be imported on selecting the required text file click the Import button.
The 3rd image shows the "Import Text Wizard", make sure that the "delimited - Characters such as comma or tab separate each field" radius option is selected, note the sample of your data will appear in the "Sample data from file" window.
Click the "Next" button and the 4th image will appear showing that the "Semicolon" has been identified as the data seperator and you can see that your data is now split into Columns [Fields] accordingly. If the first row contains Field Names ensure that the "First Row Contains Field Names" is checked, otherwise leave alone.
Click the Next button and the next step [the 5th image] will appear, as this is a brand new table ensure that the "In a New Table" radius is selected, then click the "Next" button and you will the be presented with the 6th image.
This is where you will name each of your fields and set the Data type, you will need to do this for each field in turn as shown in the 6th and 7th images. For the purpose of this demonstration I have chosen to set all fields to be of text type data, and used the default given by Access for the field names, however you may wish to keep your numerical fields of "Long integer" type and of course give your fields more meaningful names.
Once you have named your fields and selected the data type click the "Next" button and you will be presented with the 8th image, here you can choose whether or not to have a primary key, and you can choose your own primary key or you can let Access add a primary key for you. It is not a good idea to have no primary key, but that is entirely up to you. once you have decided on your choice, click the "Next" button and you will be presented with the 9th image, here you can decide on the name of your table, Access will use the name of the text file as the default name, as Access does not know what your intentions are in that regard.
Now before you go any further this is the point at which you can now create and save your import specification for future import of data that follow this format, so before you decide on the name of your table Click the "Avanced" button and you will be presented with the 10th image, here you can see all the fields that you named and their data types, click on the "Save As..." button and you will be presented with the 11th image, this is where you can give your import specification a unique name for use later on when you automate your import process.
Again Access uses the text file name as the default but I would recommend that you choose a meaningful name, for the purpose of this demonstration I have chosen "NewTxtDocImportSpec" [The 12th and 13th images] which a shorten version of "New Text Document, Import Specification" and losing any spaces in between. Click the "OK" button and the import specification will be saved within Access and you will be taken to the next image, make sure that you give your new table a meaningful name for your purposes, for the purpose of this demonstration I have chosen "tblNewTxtDoc" and then click the "Finsh" button you will be presented with the next image, which will confirm that your table hase been created using the specification just created.
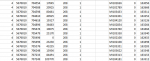
You can then view your table as shown in the last two images.
I hope this is of assistance to you.
Regards
John
") )
)
")