| Books Database repair Development Example databases Forum Tips Technical Support Training Video tutorials |
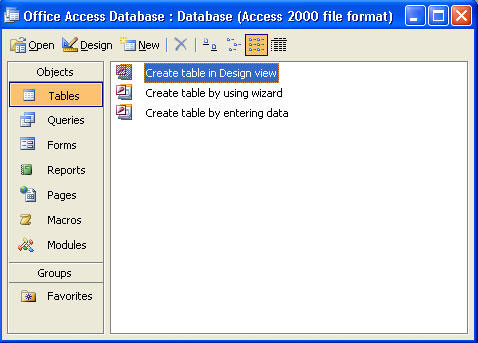
Creating Microsoft Access TablesNow, let’s begin with creating an object. We will start with making a table. Take note of the highlighted items in the image below. Click on Tables at the left part. Then, click on ‘Create table using Design view’.
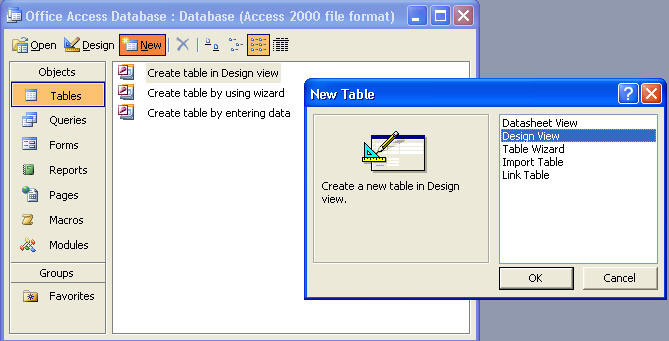
Next, click on New (highlighted in dark orange), and then click on Design View again on the new box that appears. Click OK.
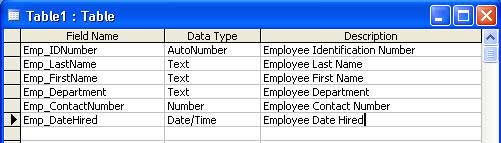
You may now start working on your Table using Design View. A window similar to the image below will appear.
Notice that it has three columns with their respective headings. The first column is for Field Name, which is for your table’s headings. The second is for Data Type. It determines the type of data that each column of your table will contain. The last one is for Description. It describes what kind of data is under the heading of your Field Name. For example, you need to make a table for the following data about your employees:
In your table, type the appropriate Field Names for each heading. Notice that Field Names do not have spaces. For Data Type, you have options in a drop down menu to choose from. For the first Field Name in the image, Emp_IDNumber, the Data Type is set to AutoNumber. It means that Microsoft Access will automatically assign numbers for your data. If you don’t want Microsoft Access to automatically assign numbers, choose Number in the drop down menu of your Data Type, like the one for Emp_ContactNumber.
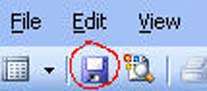
Once you have finished typing your data, you may now save your table in the database. There are a few ways to do this. You can save your table by clicking on the Save icon, as encircled in red in the image.
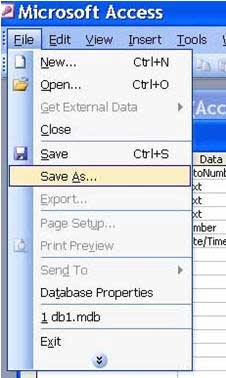
Another way is to click on File, then choose Save or Save As. The last way would be to hold Ctrl button and press S.
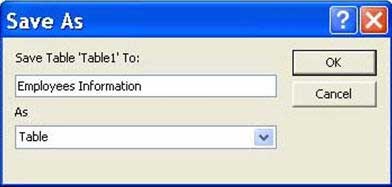
After doing any of those methods, this box will appear. For this tutorial, we will name our table Employees Information. Click OK.
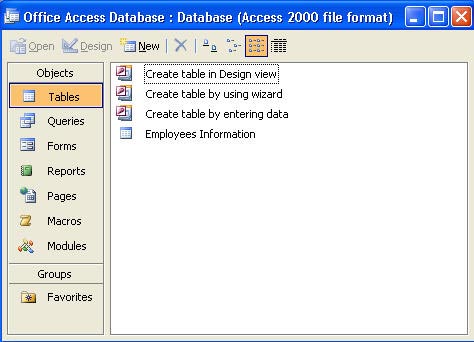
Now, we can view the contents of our database. What about the contents of the table, you ask. Open the file Employees Information, as highlighted in the image below. ** table_8.jpg did not have the table highlighted
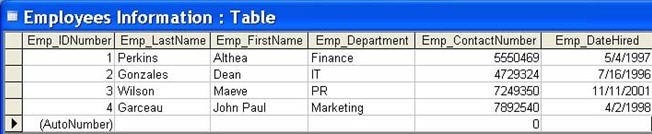
Here is a view of your table. You may now input your data into the table. Don’t forget to save.
|

Forum Archive | About us | Privacy Policy
© Access World 2010